

How to set up a course page
If you need an introduction to git, you can find one here (in Norwegian, includes an introduction to Python)
1. Create an organization
The first thing we need to do is to create an “organization”, which will own the course page. You do this as follows:
- Log in to github.com
- Go to https://github.com/organizations/plan
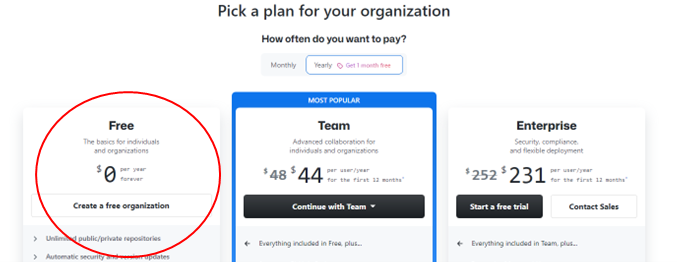
- Select “Create organization”
- Choose the “Create a free organization” option
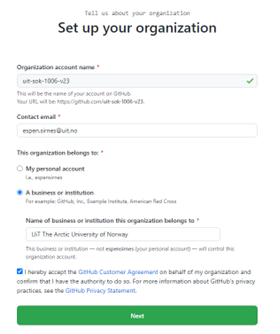
- Use the following setup:
- Name your organization using the naming convention
uit-<course_code>-<semester><year>.<course_code>can for example be SOK-1006.<semester>can be either “h” or “v” (Norwegian) or “f” or “s” (English).
Use the last two digits in<year>.
For example, the name can beuit-sok-1006-v23. - Enter your e-mail
- Select “A business or institution”
- Enter “UiT The Arctic University of Norway” as name of institution.
- Accept the terms and click “Next”
- Name your organization using the naming convention
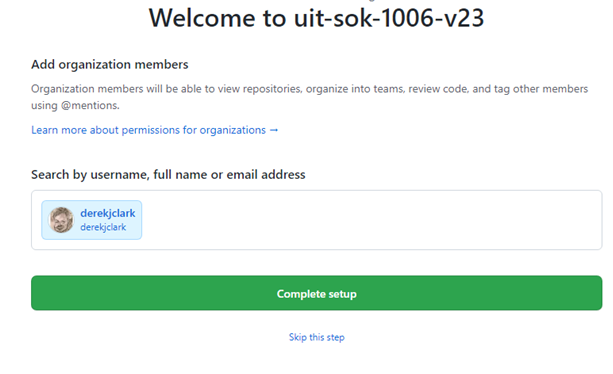
- Add the github usernames of the colleagues that are involved in the course and click “Complete setup”
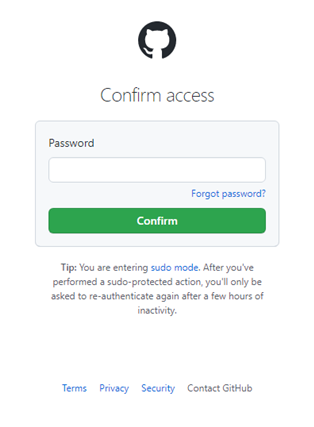
- If needed, enter your github password
- Click your icon in the upper right corner, and select “Your organizations”
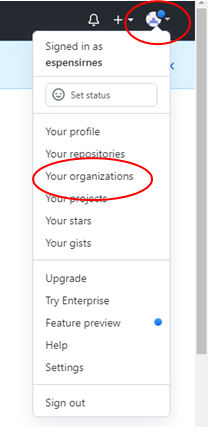
- Click on the organization you just created
2. Create the course repository (repo)
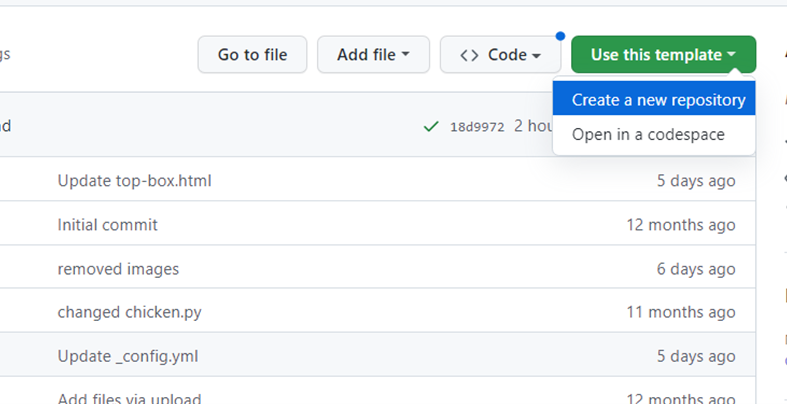
- Go to this repository: https://github.com/uit-econ/coursepage_template
- Click “Use this template” and “Create new repository”
- IMPORTANT! Change the “Owner” to the organization you just created.
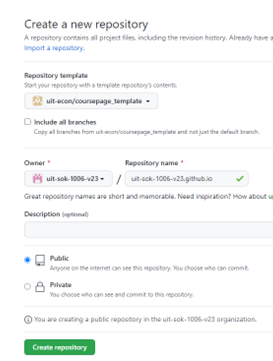
- Name the repo exactly the same as the organization name, but append “.github.io” to the name.
For example, if your organization name was “uit-sok-1006-v23”, the course repository should be “uit-sok-1006-v23.github.io”.
The purpose of this is to make the repository the default page of the organization. - Select the “Public” option and click “Create repository”
3. View the repo homepage
- Locate the “github-pages” link down to the right in your repository, and click it.
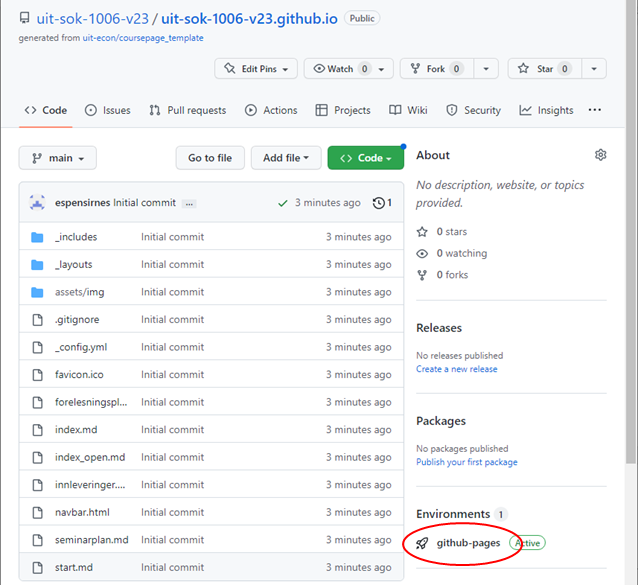
- Click on the “View deployment” in the following page, and you will see your new course page (can take a couple of minutes before it is ready, so you might have to refresh the brower a couple of times)
- If you cannot see the “github-pages” link, even after waiting for a few minutes, enable the web interface by clicking “Settings” in the repo menu, “Pages” in the left pane and “main” in the “Branch” dropdown. Then click “Save”.
4. Edit the repo
-
Edit the settings-file “_config.yml” by clicking on the pen-icon up to the right.
You only need to edit the first three lines (unless you want to edit the advanced settings). The first three lines are:- name: Sok-xxxx Emnetittel:
Required. Must be changed to the current course code and course name. - semester: Høst/Vår 20xx:
Required. Must be changed to the current semester. - image: tema.jpg:
Optional. You can upload another picture if you want. If it has another name than “tema.jpg”, you need to change this to the correct name. However you can also just delete “tema.jpg” and upload a new image with the same name.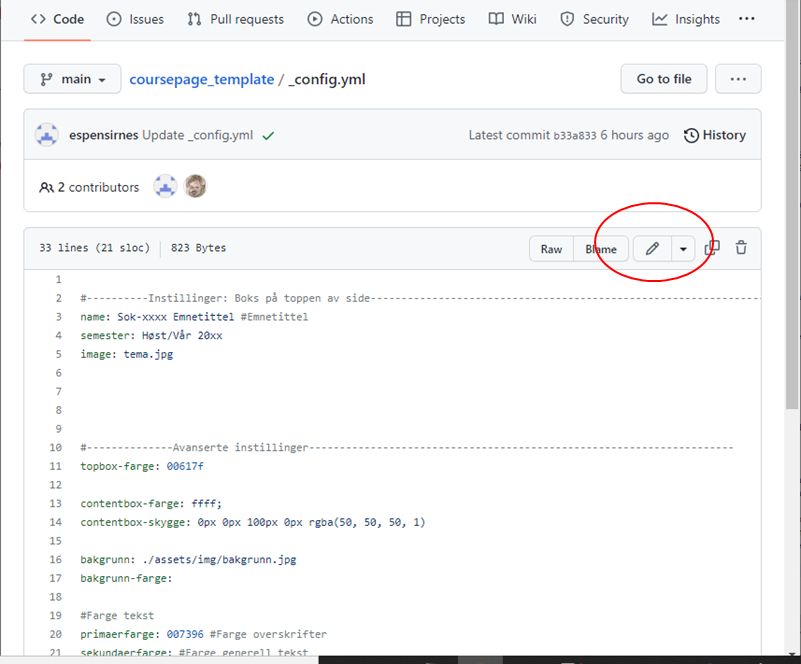
- name: Sok-xxxx Emnetittel:
-
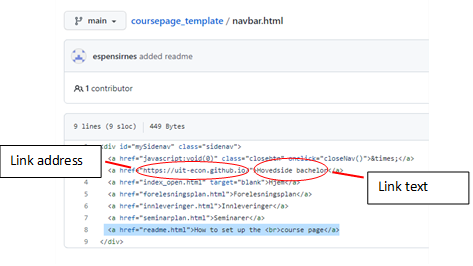
Edit the left menu of the homepage by editing the file “navbar.html”. Begin by removing the link to this document (“Hvordan sette opp en kursside”). You can edit existing links by changing the link address and the link text. If you need more items, just copy one of the links and change it.
NOTE! The markup files are automatically converted to html-files. If you want to link to a markdown *.md-file, you must change the file extension from “.md” to “.html”.
-
There are all ready templates in Norwegian for the start page (“index.md”), lecture plan (“forelesningsplan.md”), tutorial plan (“seminarplan.md”) and plan for submissions (“innleveringer.md”). You can see from these examples how you create links and tables.
IMPORTANT! If you create new markup (.md) files, always put {\% include navbar.html \%}{\% include top-box.html \%} in the top of the document. This ensures that the left menu and the top heading box are loaded with the page.
5. Edit the Samfunnsøkonomi med datavitenskap main page
In order for your course page to be available from the main page, you need to edit the corresponding item there.
- Go to the
\_portfoliofolder in theuit-econ.github.iorepository in the main page organizationuit-econhere: uit-econ/uit-econ.github.io/_portfolio/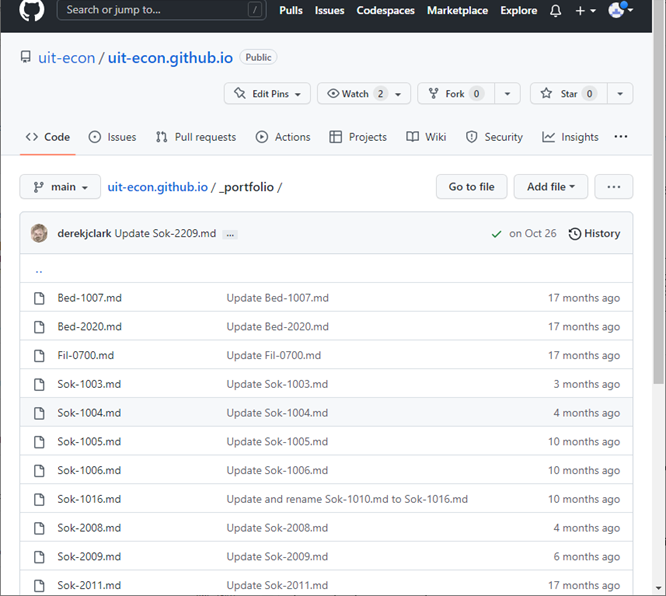
- Click on the course you are responsible for, and edit it (click on pen symbol up to the right).
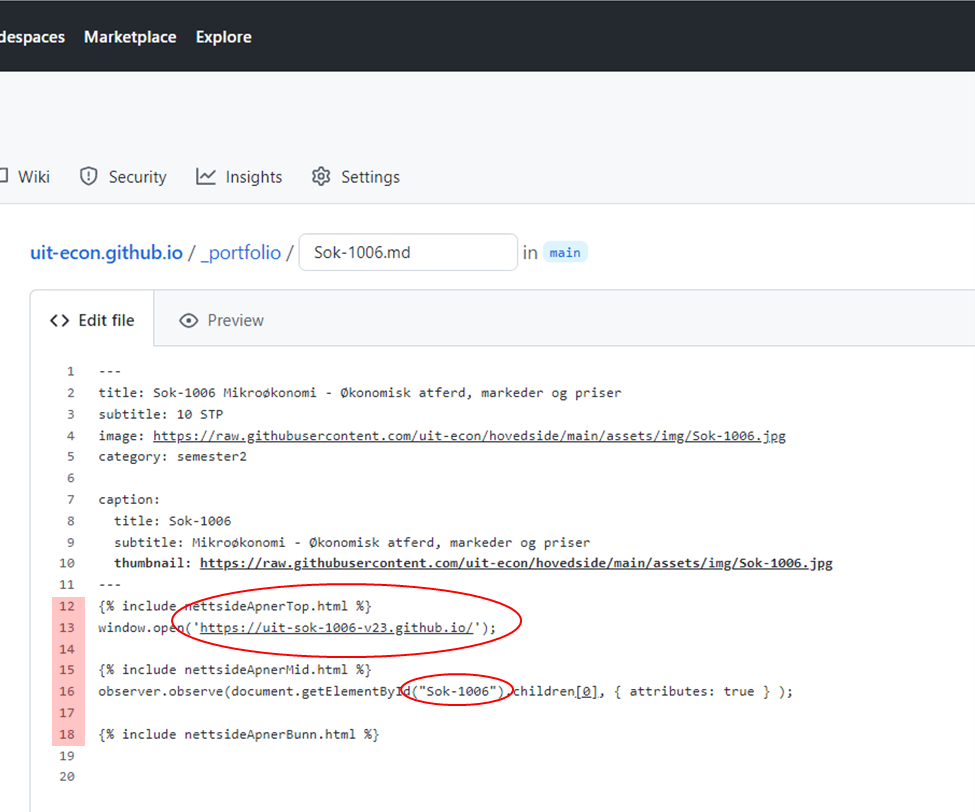
- The document you just opened may contain a course description, or not. In any case, this is how it is supposed to look:
---
title: Sok-xxxx <Navn på kurs>
subtitle: 10 STP
image: https://raw.githubusercontent.com/uit-econ/hovedside/main/assets/img/Sok-xxxx.jpg
category: semesterX
caption:
title: Sok-xxxx
subtitle: <Navn på kurs>
thumbnail: https://raw.githubusercontent.com/uit-econ/hovedside/main/assets/img/Sok-xxxx.jpg
---
{% include nettsideApnerTop.html %}
window.open('https://uit-sok-xxxx-<semester><år>.github.io/');
{% include nettsideApnerMid.html %}
observer.observe(document.getElementById("Sok-xxxx").children[0], { attributes: true } );
{% include nettsideApnerBunn.html %}
- If there was a course description there, you can copy it to “index.md” in the course repository you just created, if you want.
- If the page does not look like above, you should do the following
- delete all text
- past the text above
- substitute sok-xxxx with the course code of the course, everywhere.
- substitute ‘https://uit-sok-xxxx-<semester><år>.github.io/’ with the link to the github web page of the course. Be aware that github often automatically adds code when you paste linke, so that the text is changed to
[https://uit-sok-1006-v23.github.io/](https://uit-sok-1006-v23.github.io/)'. The link above should however be on the formhttps://uit-sok-1006-v23.github.io/. Remember quotes. - substitute the two occurencies of <Navn på kurs> with the course name.
- substitute X in semesterX with the semester the course shall go 4. When you save (commit) you will get a question about making a “pull request”, if you do not have write privileges. Push the button and ask a collegue with write privileges to accept your “pull request”.
6. Embed course page into the Canvas room
This will show you how you embed the course page into Canvas.
- Go to Canvas and select the course you are responsible for
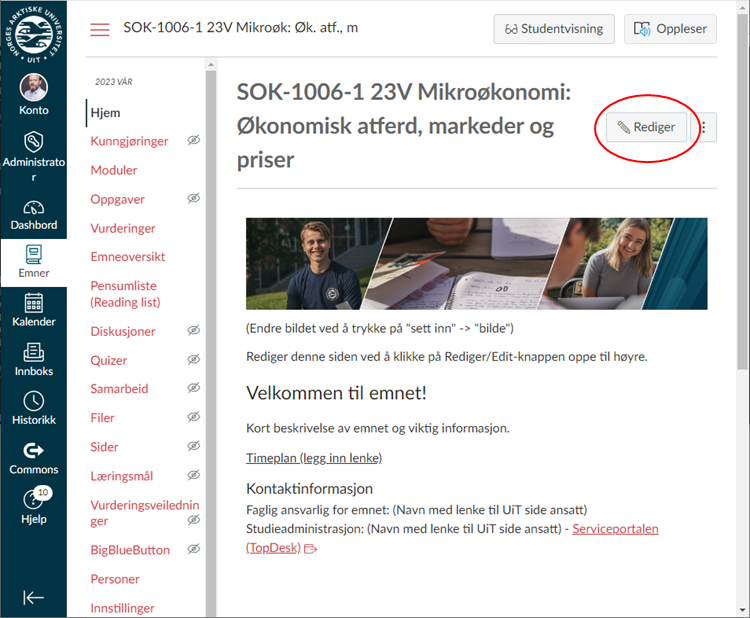
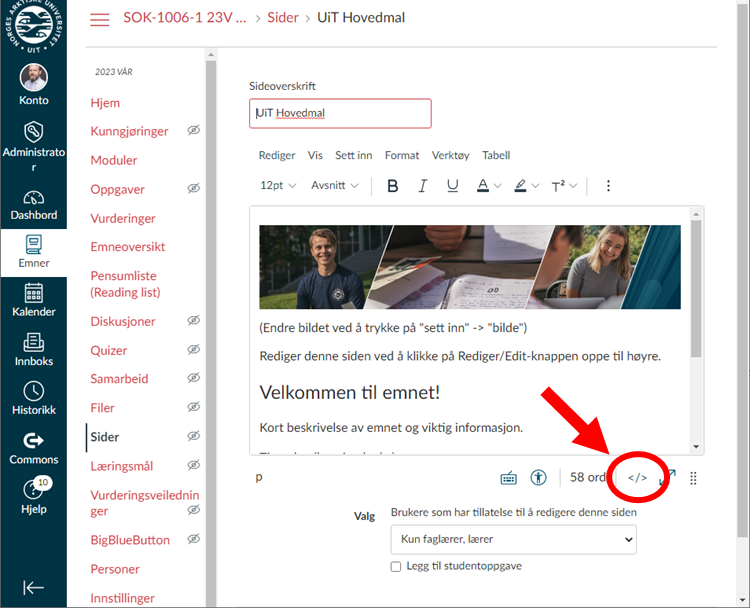
- Click the “Rediger”/”Edit” button up to the right, and then click the “< >” (edit html) symbol down to the right
- Delete all the html-contents, and paste in
<p><iframe style="overflow: hidden;"
src="replace with the link to your github homepage"
width="1500" height="3000"></iframe></p>
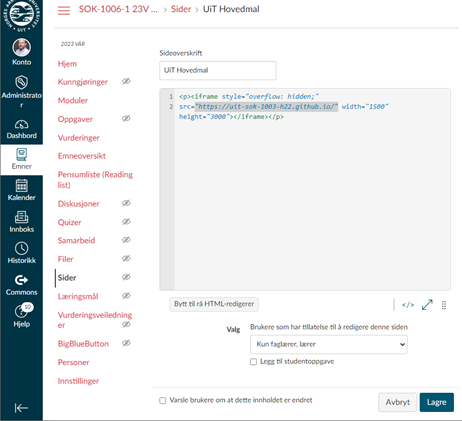
- Replace
replace with the link to your github homepagewith the link to the homepage you created in step 3.
YOUR DONE!!!!